Life is a...Moonwalk (Midterm Progress Report)
From EQUIS Lab Wiki
Contents |
Modified Project Description
Changes
For this project, we planto modify Life is a Villageto create a moon exploration game.
We decided that it would create more work for us to modify the existing Life is a Village code, than to just start from scratch, because a lot of time would be spent just eliminating things that weren't needed. Instead, we decided to use the basic example application provided in the Ogre Tutorials.
The object will be to collect moon rock samples and blue cheese (which will restorehealthenergy)before the timer (amount of oxygen left) runs out.
Based on feedback given from our project proposal, we decided that our original idea was too complicated. There were too many things to keep track of (time/oxygen, health) and it wasn't clear how they all fit together. We decided to consolidate it into one that we call "energy." With that came a new concept that will be described below under "Additions".
Different levels may present various challenges such as having to pick up blue cheese at the right points in order to make it back to the ship, moon aliens, jumping too high that you float off into space, etc.
Realistically, there won't be enough time to implement all of these extra ideas and some of them don't make sense anymore with the changes that we have made.
Additions
The player will navigate the moonscape by jumping. First, they look in the direction they would like to go, then press the spacebar to jump in that direction. The amount of time they hold down the spacebar will determine the jump strength. Jumping will take up energy, shown on the energy bar. Energy can be replenished by collecting blue cheese. Players must manage their jumps and their blue cheese consumption wisely to make it from the spaceship to the rock sample and back.
Technologies Used
OgreODE
OgreODE is a wrapper around the Open Dynamics Engine(ODE), an open-source physics engine distributed under the BSD licence. Physics engines allow us to simply specify the shapes and masses of objects and then the physics engine takes care of all of their movement. Instead of moving an object by changing its position, we can apply forces to the object and it will move in a realistic manner.
OgreODE merges the two very well. All we have to do is associate an objects physical body with its scene node, and ODE automatically updates its position.
Read more about ODE: here
Read more about OgreODE: here
Hikari
For more information, see Hikari.
We have decided to use Hikari for the generation of our HUD in "Life is a ... Moonwalk". Hikari is a library that lets you easily use Flash content in Ogre3D.
Hikari allows you to create Flash controls which can be applied as overlays or attached to objects inside the Ogre3D scene. In addition, it gives a control scheme in which actionScript can make external interface function calls to Hikari which in turn can call functions inside your game code, and vice versa. With a nice Flash value converter for proper communication.
The Library gives you the power to load Flash videos into the Flash controls, and layer them in tiers, make pure Ogre materials, check which Flash controls are focused and manage inputs based on if they are over Flash overlays.
It also allows you to control the Flash video by pausing, restarting, stepping forward, stepping backward, fast forwarding and rewinding.
The benefits allow you to easily create Flash interfaces for use in your Ogre game.
A full description can be found here: Hikari Description
There is also a very sparse Hikari Wiki
Progress
In this section, we will discuss what we did for each stage outlined in the project proposal.
Stage 1 – Terrain
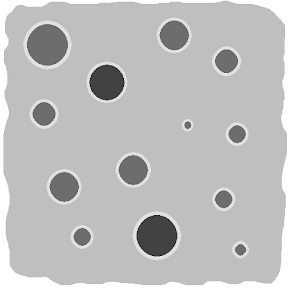
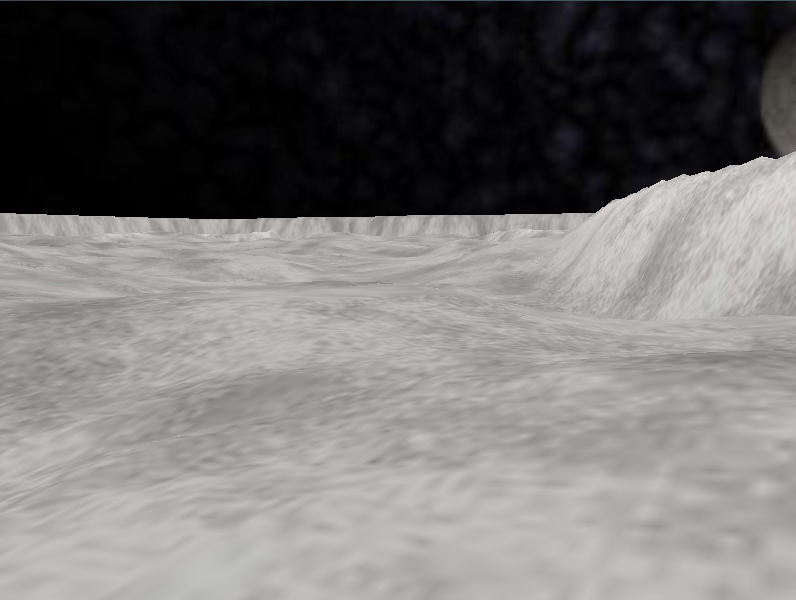
We began by using the Ogre terrain tutorial to create a basic terrain. But before we could make it look like the moon, we had to create a custom terrain. We created a resource map with The GIMP (an open source image editor) using rings to represent craters.
We then inputted the resource map and an XML file containing height parameters of all the different coloured sections to The EQUIS terrain generation tool. This tool created a heightmap and a terrain texture, which we then used for our custom moon terrain. For a detail texture, we used the one that was used in LIAV.
We added the space skybox provided by Ogre to complete the space scene. Further work may be put into creating a custom skybox, but it remains a low priority for now. Eventually, we plan on having walls surrounding the outside of the terrain, big enough to keep the player constrained to a certain area and give the illusion that they are in a giant crater.
Next Steps
- Show shadows on the terrain - The terrain generator allows us to specify a light source and cast shadows on the terrain texture.
- Create a better skybox.
Stage 2 – First Person
We created an invisible box and attached it to a SceneNode to represent our Player. The camera was then positioned in the centre of the box in the same SceneNode such that when our box moves, the camera moves with it. We added code to stabilize the camera such that it didn't rotate with the box, and code to allow the Player to control the direction of the camera using the mouse.
In doing this, we encountered a problem known as Gimbal lock. Basically, what was happening was that the camera was getting stuck when it was rotated 90 degrees around the world Y axis because this caused the local X axis to be aligned with the world Z axis. So when you try to rotate around the world Z axis nothing appears to happen.
We made it simple to toggle a debugging mode (using the preprocessor), which makes the box visible and allows us to move the camera. This proved to be useful in the next stage.
Stage 3 – Physics
Originally, we planned on using simulated physics by moving the player on a sin wave. We later decided that using a physics engine, Ogre ODE, would make things easier and look a lot more realistic.
We included the header file (OgreOde.h) at the top of the Moonwalk.h. This gave us access to all of OgreOde, which is in the OgreOde namespace. To use OgreOde, we needed the main objects: a World object, which is like the Ogre Root; a Space, which groups objects in the world; and a StepHandler which controls the advancement through time of the physics engine. Pointers to these 3 classes are stored in Moonwalk.
Initialization of the 3 objects:
mWorld = new World(mSceneMgr);
mWorld->setGravity(Ogre::Vector3(0,-1.62631,0));
mWorld->setCFM(10e-5);
mWorld->setERP(0.8);
mWorld->setAutoSleep(true);
mWorld->setContactCorrectionVelocity(1.0);
We set gravity to be a vector of length 1.62631 straight down to represent the moon's reduced gravity.
mSpace = mWorld->getDefaultSpace();

const Real _time_step = 0.01;
const Real time_scale = Real(1.0);
const Real max_frame_time = Real(1.0 / 4);
mStepper = new StepHandler(mWorld,StepHandler::QuickStep,_time_step,max_frame_time,time_scale);
mStepper->setAutomatic(StepHandler::AutoMode_PostFrame,mRoot);
The StepHandler is put in automatic model, which means that it automatically advances itself through time.
To create the terrain in the physics Space such that objects can collide with it (the values are from terrain.cfg):
const int pageSize = 513;
const Vector3 scale = Vector3(1500 / 513,100,1500 / 513);
const Real worldSizeX = scale.x * (pageSize - 1);
const Real worldSizeZ = scale.z * (pageSize - 1);

TerrainGeometry* mTerrain = new TerrainGeometry(mWorld,mSpace,scale,pageSize,pageSize,worldSizeX,worldSizeZ,false);
To include friction in our world OgreOde requires a collision listener. Whenever there is a collision the listener is called and based on which objects are colliding with each other information like friction and bounciness are set. Our listener:
bool Moonwalk::collision(Contact* contact)
{
    contact->setBouncyness(0.0);
    contact->setCoulombFriction(18.0);
    return true;
}
We encountered a problem wherein collision detection with the terrain didn't work properly. It appears to have something to do with the velocity that the object is traveling when it is supposed to hit the terrain. We believe the problem lies in the StepHandler, meaning that the object is traveling through the world at too big of an increment.
The avatar is represented as simply the camera attached to a Box in the physics world. The box may roll around on the terrain but the camera is constantly leveled with parallel to the ground. When the user jumps a force is applied to the box in the direction that the camera is looking with a magnitude based on how long the spacebar was held down. Currently, every press of the spacebar results in the maximum force.
if(mKeyboard->isKeyDown(OIS::KC_SPACE))
{
    jumpBar += time * 100;
    if(jumpBar > 100)
        jumpBar = 100;
}
else if(jumpBar > 0)
{
    Quaternion jumpRotate = Quaternion(mPlayerData->getYaw(),Vector3::UNIT_Y);
    mPlayerData->getBody()->addForce(jumpBar * (jumpRotate * JUMP_VECTOR));
    jumpBar = 0;
}
Next Steps
- Solve terrain collision detection problem.
- Implement collision detection for the collection of objects (see Stage 4).
Stage 4 – Cheese / Rock Samples
For this stage, we found a cheese model in the Google Sketchup database and modified its colour so that we had a nice blue cheese (moon cheese is blue of course).
Next Steps
- Find Google Sketchup model for Rock Samples.
- Implement collision detection with Cheese / Rock Samples such that they modify variables that affect the game (eg. energy).
Stage 5 – HUD
As mentioned above, we plan on using Hikari to implement a heads up display (HUD). This far we have managed to successfully compile and run various demos and integrate the Hikari library into our code base. Since there is very little Flash experience among group members, Flash components have been outsourced. The following describes the 3 Flash components needed:
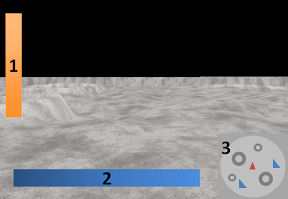
- We will need a Flash video of a vertical bar that drains slowly, with a counter of percentage filled at the bottom. This will represent the 'Energy Levels' of our robot. When this bar is completely depleted the character is 'dead'. We would like this to have an actionScript that will make a call to Hikari when the bar is depleted, informing it that the energy has reached zero. This could also be implemented in the game code itself by simply constantly checking if the video has reached its final frame.
- We will need a Flash video of a horizontal bar that, upon hitting the space bar, will begin to play filling up then draining from left to right then right to left until the space bar is released. This will represent our jump strength. After release the bar will maintain its frame for a few moments before restarting. This can be handled in more than one way. Ideally, when the space bar is pushed, the input is captured by the Flash file, which will start the animation. Then, upon release, it will return its frame number, or some other number in a way to measure the power of the jump. Alternatively, in our own implementation of an input listener, we can step each frame of the Flash media forward manually and rewind, then take the step number as our power.
- We will also need a square with a circular window removed as transparent pixels to allow a viewport, as we will lay this on top of our mini-map to give it a more aesthetic and round appearance. This will be more of a static image and does not require any actionScript.
Next Steps
- Add Flash objects and get them to communicate with the main game.
Stage 6 – Levels
No progress has been made on this stage at this point.
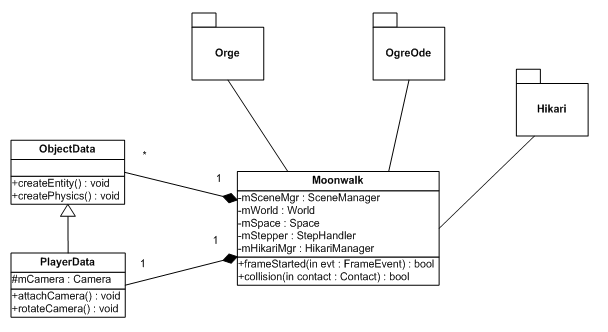
Architecture
The following class diagram shows the current architecture of Life is a...Moonwalk. It does not reflect the final architecture we intend to have.