Life is a...Moonwalk (Final Report)
From EQUIS Lab Wiki
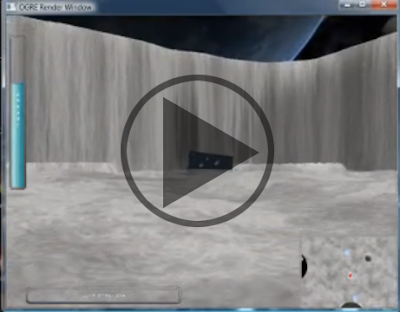
MoonWalk is a video game project made by Andrew Brown, Douglas Martin, and Chris Perez at Queen's University for CISC 877. This document outlines the progress made over the course of 4 months. To see it in action, click the video link on the right.
Contents |
Project Description
MoonWalk is a moon exploration game built with Ogre. The player takes on the role of a robot tasked with finding and collecting rock samples found on the moon's surface. Movement is accomplished by jumping; the player looks in the direction they want to go and presses the spacebar. The Jump Bar will fill up and drain again until the player releases the spacebar. This amount corresponds to the strength of the jump. If let go when the jump bar is full, the character will jump at maximum strength. If let go when it's lower, the jump will be proportional.
The robot has a limited amount of energy, and that energy continues to drain over time and as they jump. In order to make it to the rock sample (and win the level), the player must carefully plan their jumps and collect the Blue Cheese scattered throughout the level, which will restore the robot's energy.
The Interface
Controls
To control the robot:
- Use the mouse to look around.
- Use spacebar to jump.
- Hold down the spacebar to activate the Jump Bar.
- Once the Jump Bar has reached the desired strength, let go of the spacebar to jump.
- While in the air, use x to stop moving forward and fall back down to the ground.
- Press p or h to pause the game and view the help screen.
- While on the "Game Over!" or "You Win!" screens, press the enter key to reset and try a new level.
HUD
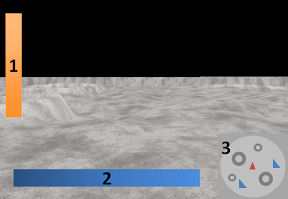
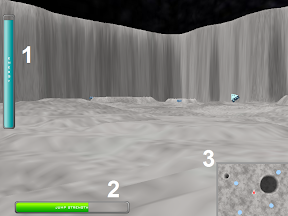
There are 3 components to the heads up display (or HUD):
- Energy Bar - This bar indicates the amount of energy left. When this bar empties, the game is over.
- Jump Bar - This bar indicates the strength of the player's jump. It is activated when the spacebar is pressed and deactivated when it is released.
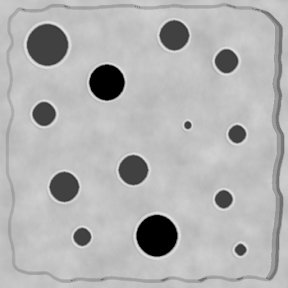
- Mini-map - This gives the player a bird's-eye view of the surrounding area, allowing them to see inside craters that they may not otherwise be able to see. The robot's position and direction is represented by the red triangle in the centre, blue cheese is indicated by blue circles, and the rock sample is indicated by the gold sparks surrounding it.
Technologies Used
OgreODE
OgreODE is a wrapper around the Open Dynamics Engine(ODE), an open-source physics engine distributed under the BSD licence. Physics engines allow us to simply specify the shapes and masses of objects and then the physics engine takes care of all of their movement. Instead of moving an object by changing its position, we can apply forces to the object and it will move in a realistic manner.
OgreODE merges the two very well. All we have to do is associate an object's physical body with its scene node, and ODE automatically updates its position.
Read more about ODE: here
Read more about OgreODE: here
Hikari
- For more information, see Hikari.
We decided to use Hikari for the generation of our HUD in "Life is a ... Moonwalk". Hikari is a library that lets us easily use Flash content in Ogre. This content can be applied as an overlay or attached to an object inside the Ogre scene upon which the animation can be paused, restarted, stepped forward, stepped backward, fast forwarded or rewound. In addition, it gives a control scheme in which actionScript can make external interface function calls to Hikari, which in turn can call functions inside game code, and vice versa. For our purposes, we are only using it to display Flash objects (the Energy Bar, and the Jump Bar) on an overlay and then updating their state (i.e. which frame of the animation they are displaying) from within our game code.
A full description can be found here: Hikari Description
There is also a very sparse Hikari Wiki
Progress
In this section, we will discuss what we did for each stage outlined in the project proposal.
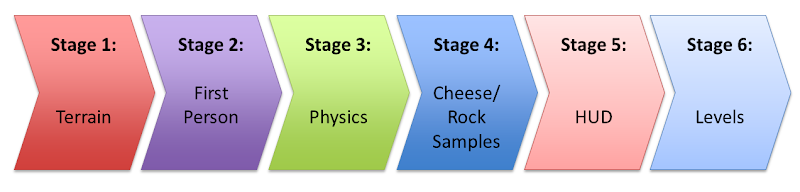
Stage 1 – Terrain
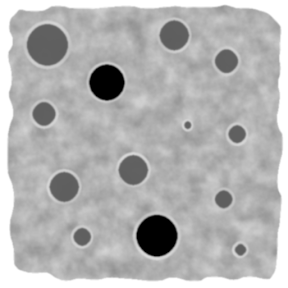
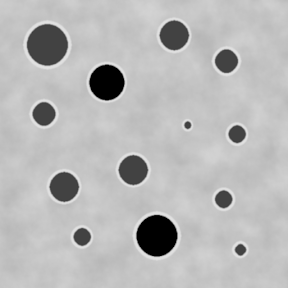
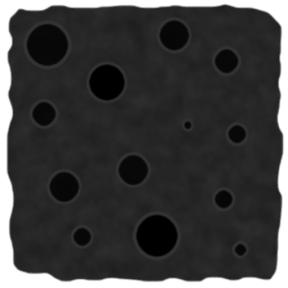
We began by using the Ogre terrain tutorial to create a basic terrain. But before we could make it look like the moon, we had to create a custom terrain. We created a resource map with The GIMP (an open source image editor) using rings to represent craters.
We then inputted the resource map and an XML file containing height parameters of all the different coloured sections to The EQUIS terrain generation tool. This tool created a heightmap and a terrain texture, which we then used for our custom moon terrain. For a detail texture, we used the one that was used in LIAV.
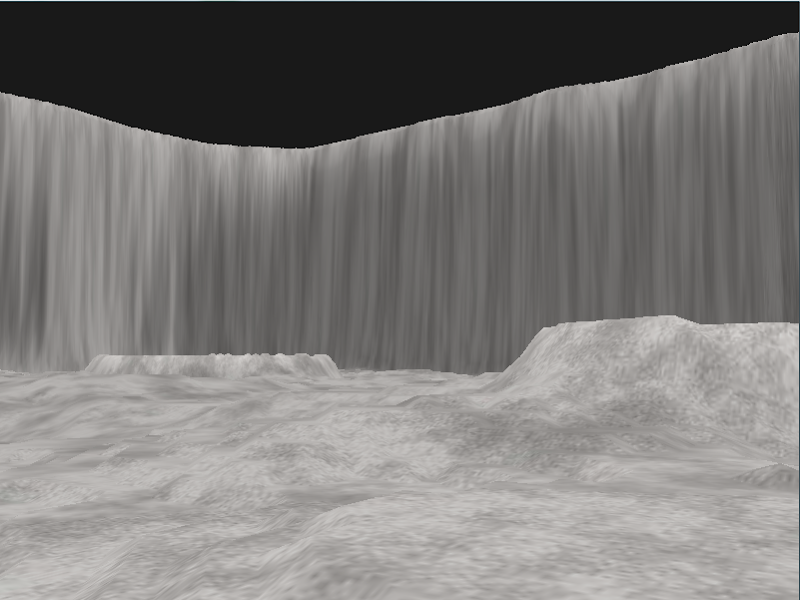
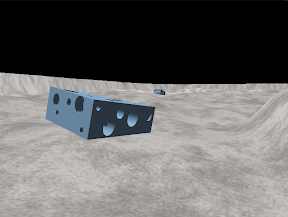
We added the example space skybox provided by Ogre to complete the space scene. The result looked like this:
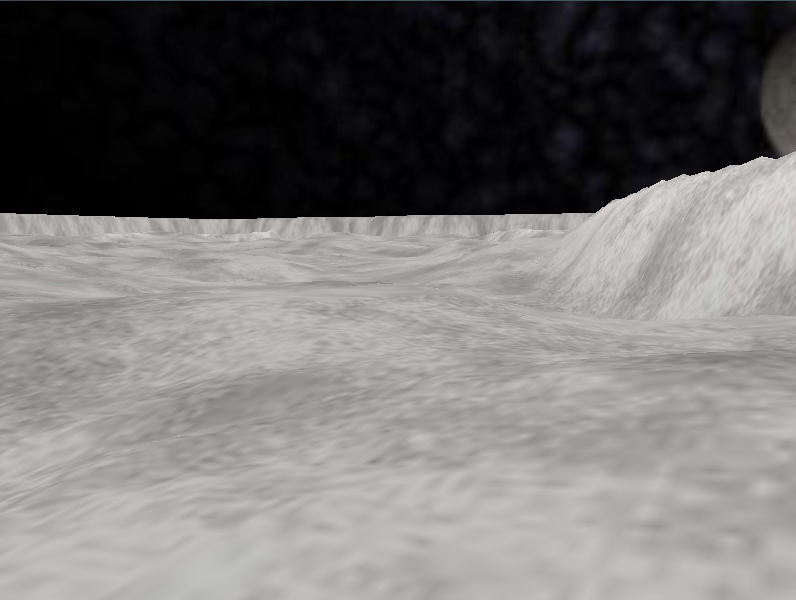
Later in the project, we tweaked the terrain such that the ridge around the outside was higher, preventing the player from leaving the world. At the same time, we used the EQUIS terrain generator to put shadows in the terrain. This showed up really nicely around the outer ridge.
The end result looked like this:
Initially, we had planned on creating and using our own sky box instead of the example space skybox provided by Ogre. However, once we got the high ridges on the outside of the terrain, we discovered that the skybox was not as prominent as before, and it would not be worth the little time we had to create our own.
Stage 2 – First Person
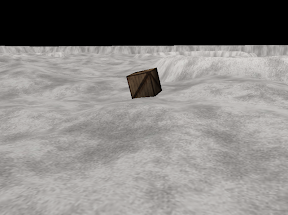
We created an invisible box and attached it to a SceneNode to represent our Player. The camera was then positioned in the centre of the box in the same SceneNode such that when our box moves, the camera moves with it. We added code to stabilize the camera such that it didn't rotate with the box, and code to allow the Player to control the direction of the camera using the mouse.
In doing this, we encountered a problem known as Gimbal lock. Basically, what was happening was that the camera was getting stuck when it was rotated 90 degrees around the world Y axis because this caused the local X axis to be aligned with the world Z axis. So when you try to rotate around the world Z axis nothing appears to happen.
We made it simple to toggle a debugging mode (using the preprocessor), which makes the box visible and allows us to move the camera. This proved to be useful in the next stage.
Stage 3 – Physics
Originally, we planned on using simulated physics by moving the player on a sin wave. We later decided that using a physics engine, like Ogre ODE, would make things easier and look a lot more realistic.
We included the header file (OgreOde.h) at the top of the Moonwalk.h. This gave us access to all of OgreODE, which is in the OgreOde namespace. To use OgreOde, we needed the main objects: a World object, which is like the Ogre Root; a Space, which groups objects in the world; and a StepHandler which controls the advancement through time of the physics engine. Pointers to these 3 classes are stored in Moonwalk.
Here is the initialization of the 3 objects:
mWorld = new World(mSceneMgr);
mWorld->setGravity(Ogre::Vector3(0,-1.62631,0));
mWorld->setCFM(10e-5);
mWorld->setERP(0.8);
mWorld->setAutoSleep(true);
mWorld->setContactCorrectionVelocity(1.0);
We set gravity to be a vector of length 1.62631 straight down to represent the moon's reduced gravity.
mSpace = mWorld->getDefaultSpace();

const Real _time_step = 0.01;
const Real time_scale = Real(1.0);
const Real max_frame_time = Real(1.0 / 4);
mStepper = new StepHandler(mWorld,StepHandler::QuickStep,_time_step,max_frame_time,time_scale);
mStepper->setAutomatic(StepHandler::AutoMode_PostFrame,mRoot);
The StepHandler was put in automatic mode so that it automatically advances itself through time.
To create the terrain in the physics Space such that objects can collide with it, we initialize a new TerrainGeometry. Most of this code was taken out of the OgreODE tutorial.
Ogre::Vector3 scale = Ogre::Vector3::ZERO;
int nodes_per_side = 0;
int nodes_per_side_all_pagesW = 0;
int nodes_per_side_all_pagesH = 0;
bool center;
// Terrain Scene Manager should support those...
mSceneMgr->getOption("Scale", &scale);
mSceneMgr->getOption("PageSize", &nodes_per_side);
Real worldWidth, worldHeight;
if (nodes_per_side == 0)
{
    Ogre::ConfigFile config;
    Ogre::String val;
    config.load("moon_terrain.cfg", "=", true);
    val = config.getSetting( "PageSize" );
    assert( !val.empty() );
    nodes_per_side = atoi( val.c_str() );
    val = config.getSetting( "PageWorldX" );
    assert( !val.empty() );
    scale.x = (float)atof( val.c_str() ) / nodes_per_side;
    val = config.getSetting( "MaxHeight" );
    assert( !val.empty() );
    scale.y = (float)atof( val.c_str() );
    val = config.getSetting( "PageWorldZ" );
    assert( !val.empty() );
    scale.z = (float)atof( val.c_str() ) / nodes_per_side;
}
center = false;
worldWidth  = scale.x * (nodes_per_side - 1);
worldHeight = scale.z * (nodes_per_side - 1);
nodes_per_side_all_pagesW = nodes_per_side;
nodes_per_side_all_pagesH = nodes_per_side;
TerrainGeometry* mTerrain = new TerrainGeometry(world,space,scale,nodes_per_side_all_pagesW,nodes_per_side_all_pagesH,worldWidth,worldHeight,center);
To include friction in our world, OgreODE requires a collision listener. Whenever there is a collision the listener is called and based on which objects are colliding with each other information like friction and bounciness are set. This allows the player object (invisible crate) to stay on the terrain and not fall through.
bool Moonwalk::collision(Contact* contact)
{
    contact->setBouncyness(0.0);
    contact->setCoulombFriction(18.0);
    return true;
}
We encountered a problem wherein collision detection with the terrain didn't work properly. It turned out that some example code given in the OgreODE tutorial was copied wrong. This was fixed and collision with the terrain behaved properly.
The avatar is represented simply as the camera attached to a box in the physics world. The box may roll around on the terrain but the camera is constantly leveled parallel to the ground. When the user jumps a force is applied to the box in the direction that the camera is looking with a magnitude based on how long the spacebar was held down.
if(mKeyboard->isKeyDown(OIS::KC_SPACE))
{
    if(jumpCount < JUMP_COUNT_MAX)
    {
        jumpBar += time * JUMP_MULTI * jumpDelta;
        if(jumpBar > JUMP_MAX)
        {
            jumpBar = JUMP_MAX;
            jumpDelta = -1;
        }
        if(jumpBar < 0)
        {
            jumpBar = 0;
            jumpDelta = 1;
        }
    }
}
else if(jumpBar > 0)
{
    Quaternion jumpRotate = Quaternion(mPlayer->getYaw(),Vector3::UNIT_Y);
    mPlayer->getBody()->addForce(jumpBar * (jumpRotate * JUMP_VECTOR));
    mPlayer->setEnergy(mPlayer->getEnergy() - (jumpBar * JUMP_ENERGY));
    jumpBar = 0;
    jumpCount++;
}
The player can also cancel out the forces currently on the robot by holding 'x'. A force is applied in the opposite direction as the current velocity on the robot. This costs the user a large amount of energy.
if(mKeyboard->isKeyDown(OIS::KC_X))
{
    mPlayer->getBody()->addForce(-1 * JUMP_CANCEL * mPlayer->getBody()->getLinearVelocity().normalisedCopy());
    mPlayer->setEnergy(mPlayer->getEnergy() - (time * JUMP_CANCEL));
}
Stage 4 – Cheese / Rock Samples
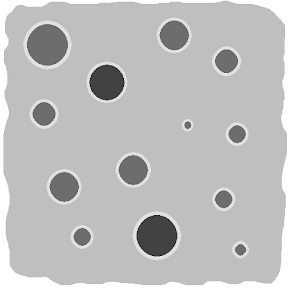
For this stage, we found a cheese model in the Google Sketchup database and modified its colour so that we had a nice blue cheese (moon cheese is blue, of course). We then found a rock model for our Rock Sample.
To detect collisions associated with the cheese and rock sample, we modified our collision method from Stage 3.
First we get the 2 objects that are colliding, called firstGeom and secondGeom respectively.
    Geometry* firstGeom = contact->getFirstGeometry();
    Geometry* secondGeom = contact->getSecondGeometry();
Then we must decide whether one of the objects is the player. If so, we set otherGeom to the object that is not the player. If neither of the colliding objects is the player, then it must be the cheese or rock sample colliding with the terrain and we handle it similar to the way we handled collision of the player with the terrain in Stage 3.
    Geometry* otherGeom = NULL;
    if(firstGeom == mPlayer->getGeometry()) //player and other
    {
        otherGeom = secondGeom;
    }
    else if(secondGeom == mPlayer->getGeometry()) //player and other
    {
        otherGeom = firstGeom;
    }
    else //cheese and terrain
    {
        contact->setBouncyness(0.0);
        contact->setCoulombFriction(18.0);
        return true;
    }
Next, we check to see if otherGeom is the rock sample, in which case the player wins. In this event, we display the "YOU WIN!" screen and pause the game.
    //check for win!!
    if(otherGeom == mRock->getGeometry() && !gameOver)
    {
        gameOver = true;
        mFullOverlay->load("win.swf");
        mFullOverlay->setOpacity(0.7f);
        pause(true);
    }
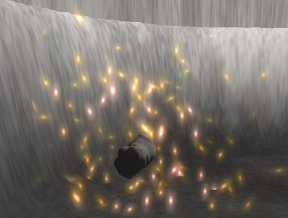
Next, we must check to see if one of the cheese objects is the other object. Since there are 20 cheese objects, we must iterate through all of them to find out which one it is (if any). If we find the cheese object with which the player is colliding, we call its eat() method, which makes it invisible and plays a particle effect, and we add to the player's energy.
    //Check for cheese
    for(std::list<Cheese>::iterator iter = mCheeseList.begin();
            iter != mCheeseList.end(); ++iter)
    {
        if(otherGeom == iter->getGeometry())
        {
            iter->eat();
            mPlayer->setEnergy(mPlayer->getEnergy() + CHEESE_ENERGY);
            return true;
        }
    }
After that, we know that otherGeom must be the terrain, and we call our player/terrain collision code as before in Stage 3.
    //otherGeom is the terrain
    jumpCount = 0;
    contact->setBouncyness(0.0);
    contact->setCoulombFriction(18.0);
    return true;
Stage 5 – HUD
Mini-map
The mini-map was done by creating a separate camera positioned over the player and looking down. We then create a 2DRectangle and attach it to a new ScreenNode. Any time the player jumps or rotates the camera, this camera is updated too.
To get the circles over the Cheese positions on the map, we made a circular marker when each Cheese object is constructed and positioned it high above the terrain.
 mMarker = sceneMgr->getRootSceneNode()->createChildSceneNode(name + "Marker");
 ManualObject* circle = sceneMgr->createManualObject(name + "Circle");
 circle->begin("Cheese_Marker",RenderOperation::OT_TRIANGLE_FAN);
 int i = 0;
 for(float theta = 0; theta < 2 * Math::PI; theta += Math::PI / MARKER_ACCURACY)
 {
   circle->position(0,MARKER_RADIUS * cos(theta),MARKER_RADIUS * sin(theta));
   circle->index(i++);
 }
 circle->index(0);
 circle->end();
 mMarker->attachObject(circle);
Every time the mini-map camera's position changes (i.e. the player jumps, rotates camera), the marker's position is changed such that it is always between the mini-map camera and the associated Cheese object.
 void Cheese::updateMarker(const Vector3& miniPos)
 {
   Vector3 toMini = miniPos - mNode->getPosition();
   mMarker->setOrientation(Vector3::UNIT_X.getRotationTo(toMini));
   mMarker->setPosition(miniPos - ((MARKER_POSITION / toMini.length()) * toMini));
 }
Doing this ensures that the circle is covering the barely visible cheese on the mini-map and thus shows the correct position of the cheese. It also means that the markers are never visible from the Player Camera, since their surface normal is never facing the player.
Flash / Hikari
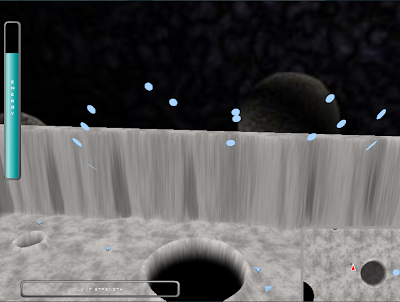
As mentioned above, we used Hikari to implement a heads up display (HUD). Since there is very little Flash experience among group members, most Flash components (i.e. The Energy Bar and the Jump Bar) were outsourced. The following describes the 6 Flash components used:
- We used a Flash video of a vertical bar that drains slowly to represent the energy level of our robot. When this bar is completely depleted the character is 'dead'.
- We used a Flash video of a horizontal bar that, upon hitting the space bar, begins to play filling up then draining from left to right then right to left until the space bar is released. This will represent our jump strength. After release the bar will maintain its frame for a few moments before restarting.
- We also used a square frame to go around the mini-map. This is mostly for aesthetic reasons, but also to put a red triangle in the centre to represent the player's current position.
- (Not pictured) We used a Flash object for the help screen.
- (Not pictured) We used a Flash object for the Game Over screen.
- (Not pictured) We used a Flash object for the You Win screen.
Adding Flash objects to the screen is really simple. For example, here is how we added the Energy Bar:
  mEnergyOverlay = mHikariMgr->createFlashOverlay("energyBar",mWindow->getViewport(0),50,400,Position(0,0),0);
  mEnergyOverlay->load("energy.swf");
  mEnergyOverlay->stop();
  mEnergyOverlay->setTransparent(true,true);
Stage 6 – Levels
Time constraints meant that we did not have enough time to complete this stage of the design. What we did was randomly place 20 pieces of cheese and the rock sample at the beginning of the game. When the game ended - either by collecting the rock sample and winning, or by running out of energy and losing - we reset the game and get new positions for the cheese and rock sample. This produced a playable game, but without any game balance. For instance, the first level generated may be trivially easy (i.e. the rock sample is nearby), while the next level generated may be impossible (i.e. the rock sample is on the opposite side of the terrain with no cheese samples in between).
This actually turned out really well for demoing the game because it meant that someone could sit down and play a level or two, and then someone else could come along and play a level without having to start at a higher, more difficult level, or having to restart the game entirely. The randomness brought a level of fairness to these sessions, so if a player got a difficult level two times in a row, it could be blamed on bad luck.
Architecture
The following is an overview of the architecture of Moonwalk in Fiia Notation:
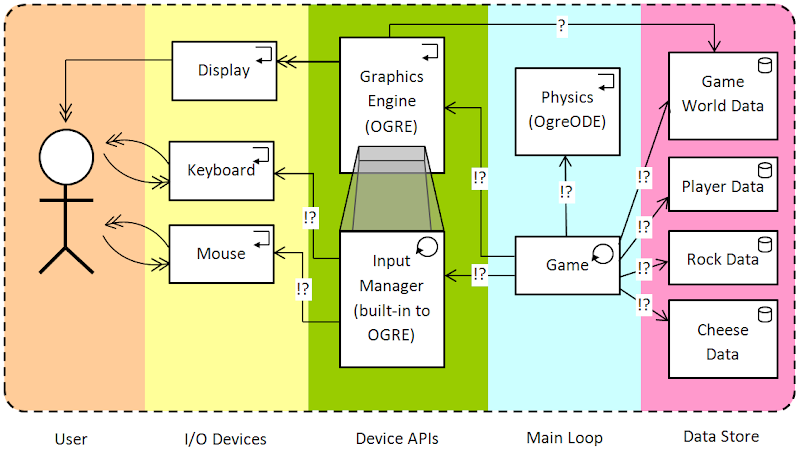
The following UML class diagram shows the final architecture of Moonwalk:
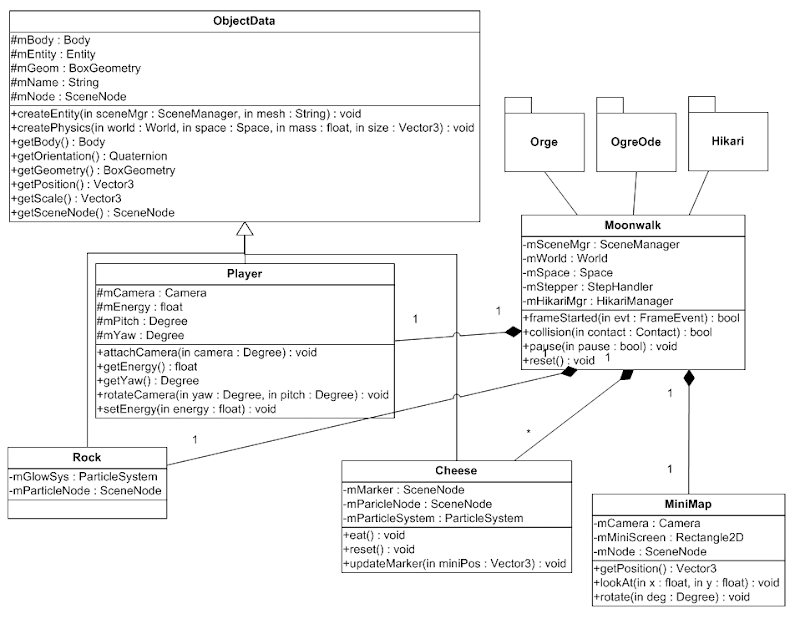
MoonWalk has the following components:
- Moonwalk.cpp - This is the heart of the game, where the main game loop is located.
- Minimap.cpp - This class contains the constructor for the minimap, and methods to update the camera position.
- ObjectData.cpp - This contains data and methods common to all the objects in our world (ie. the player, cheese, and rock sample). This includes the objects geometry, orientation, position, etc.
- PlayerData.ccp - A subclass of ObjectData.cpp. This contains the player camera along with methods for updating the position of the camera. It also contains the player's energy and a method top set that energy.
- CheeseData.cpp - A subclass of ObjectData.cpp. This contains a particle system for playing a particle effect when the cheese is consumed (called by the eat method). Also, because cheese is displayed on the mini-map as a blue circle, it contains information associated with a marker and a method for updating the position of that marker when the camera moves.
- RockData.cpp - A subclass of ObjectData.cpp. This contains a particle system to play a sparkling particle effect around the rock sample.
Lessons Learned
The following is a list of things that went well:
- Using a physics engine like OgreODE was a good decision. After we got over the initial hurdle of figuring out how to use it, it made everything so much easier. Initially we had planned on faking the physics, but looking back, it would have been a lot more work with a lot more potential to break.
- The discovery of Hikari allowed us to have a really attractive UI.
Overall, everything went well and there is nothing we would have done differently. Our plan was flexible enough to accommodate the tight time constraints. In the end, we managed to put together a solid base for a (hopefully) fun game.
Credits
Andrew Brown
- Lead Programmer
Douglas Martin
- Lead Designer
Chris Perez
- Programmer
- Designer
